How to publish a CD / DVD, 4
After these steps, you can press the Build button to create the CD / DVD. The program will ask if you want to save the settings in a .wzz file (es. test.wzz) (in this way you can make multiple copies of the same CD without any difficulty).
Then it shows a test button, useful to try the install as if you were the final user.
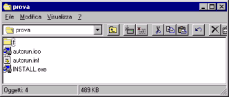
Now if you take a look on C:\test youll see these files:
These are all that you need to copy to the root (main folder) of a CD.
You must copy THE CONTENT of this folder, not the folder.
So a correct CD will contain:
- a file called "autorun.ico"
- a file called "autorun.ini"
- a file called "install.exe"
- sometimes a file called readme.txt can be present
- a folder called "f" that contains several files
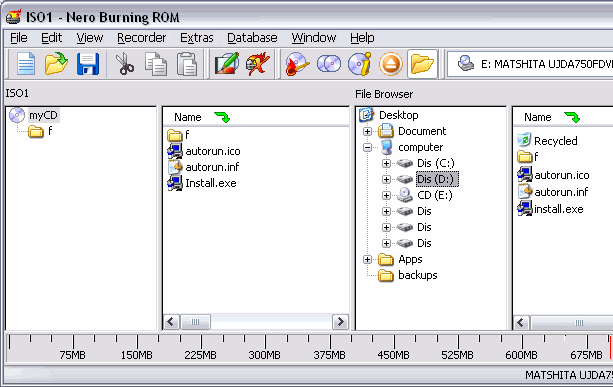
The program does not actually burn the files on CD. You can do this with your usual CD writer software (EasyCD, Nero, WinOnCD...). Normally you drag and drop to create a CD.
Below what you could see with Nero. In the image below you may notice (on the right) that we used a D: hard disk drive for creating the temporary CD, instead of the temporary folder (this may be handy for tests)
Just burn the CD then insert it in the CD drive to test. It will work.
We do strongly recommend to test the CD onto another PC (not the one used for the editing) so you will avoid mistakes.
The most common mistake is to burn the temporary folder on the CD, instead of *the content* of the temporary folder.
Another common mistake is to burn only the 3 files above, and not the folder "f" and the content of the folder "f" (that must go into a folder called f on the CD).
See
Advanced functions for learning other interesting things such as the
automatic remote update feature.
Do you have a precise and constructive suggestion on how to improve this page with more clear instructions / detail?
Contact us!
Some other VisualVision professional software programs: